Last update: December 25, 2021
En 2012 j’ai installé avec succès la distribution Debian Linux sur un ancien notebook Sony Vaio, avec clavier AZERTY, 1 MB RAM et processeur Centrino Duo. Dans le cadre d’un projet j’étais amené à compiler une librairie Java complexe sur base d’un fichier Rakefile. Comme la compilation échouait sous Windows XP, Vista et 7, je cherchais d’autres solutions pour progresser. Comme le créateur du fichier Rakefile effectuait ses développement sous Linux, je privilégiais la piste d’installation d’un nouveau système de développement Linux sur un ordinateur séparé comme première solution.
Linux
Linux est le nom couramment donné à tout système d’exploitation libre fonctionnant avec le noyau Linux. Le noyau Linux a été créé en 1991 par Linus Torvalds pour les compatibles PC construits sur l’architecture processeur x86. Depuis, il a été porté sur de nombreuses architectures et il est utilisé dans une très large gamme d’ordinateurs, de serveurs et de systèmes embarqués. Ses caractéristiques principales sont d’être multitâche et multi-utilisateur. Linux bénéficie d’une communauté de milliers de programmeurs qualifiés qui font évoluer le noyau et les paquets.
Commandes Linux
Linux dispose de centaines, voire de milliers de commandes. Une vue d’ensemble des commandes Linux les plus importantes a été publiée en 2021 par PC & Network Downloads (PCWDLD).
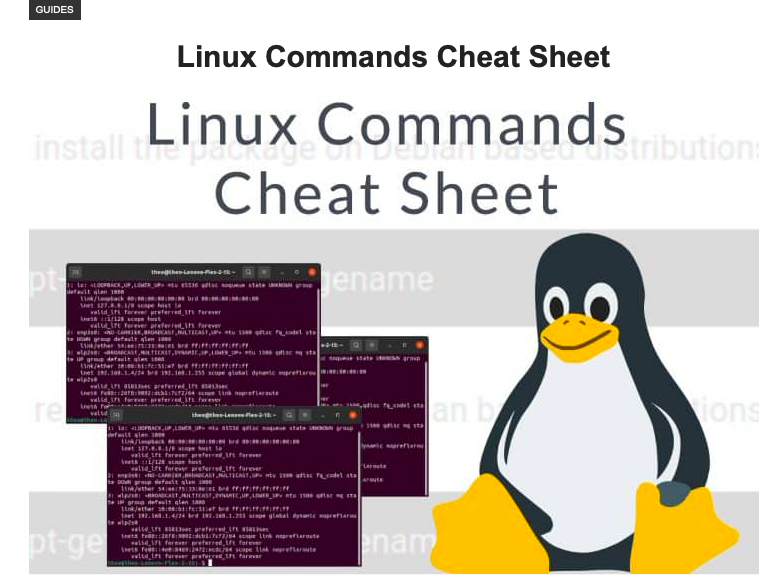
Linux Commands Cheat Sheet (PCWLDL)
PCWLDL publie des tutoriels et revues et fournit des conseils dans le domaine des technologies d’information, en particulier en relation avec des applications Linux/Ubuntu/Centos/Unix/Cisco etc.
Distributions Linux
Il existe plusieurs distributions Linux différentes, par exemple :
Debian Linux
Comme la distribution Debian est à l’origine de différentes autres distributions et considérée comme très stable, j’ai choisi cette variante de Linux pour la création du système de développement. Il y avait trois versions Debian à l’époque : stable = Squeeze, testing = Wheezy, development = Sid disponibles pour 12 architectures. La version Wheezy disponible il y a un an était 7.2, publiée le 12 octobre 2013. En 2015, la version stable est Jessie.
J’avais téléchargé les images ISO officielles pour DVD pour l’architecture i386. Il s’agit des fichiers suivants :
- debian-7.2.0-i386-DVD-1.iso
- debian-7.2.0-i386-DVD-2.iso
- debian-7.2.0-i386-DVD-3.iso
- debian-update-7.2.0-i386-DVD-1.iso
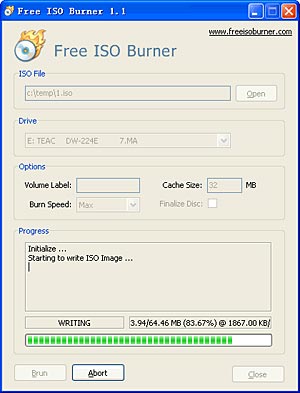
Les fichiers ont été gravés sur DVD avec le programme Free ISO Burner. J’ai démarré le notebook Sony Vaio avec la première DVD installé dans le lecteur et suivi les instructions sur l’écran. Les fichiers iwlwifi-3945-1.ucode et iwlwifi-3945-2.ucode ont été demandés lors de l’installation. J’ai cherché ces deux fichiers sur Internet et chargé sur un stick USB. Les autres DVD ont été scannés par le système et l’insertion de l’une ou l’autre DVD dans le lecteur a été demandé en fonction de l’installation des différents paquets. J’ai du répéter l’installation plusieurs fois à cause d’erreurs de manipulation (try and error). Finalement le système était opérationnel et le desktop se présentait comme suit :
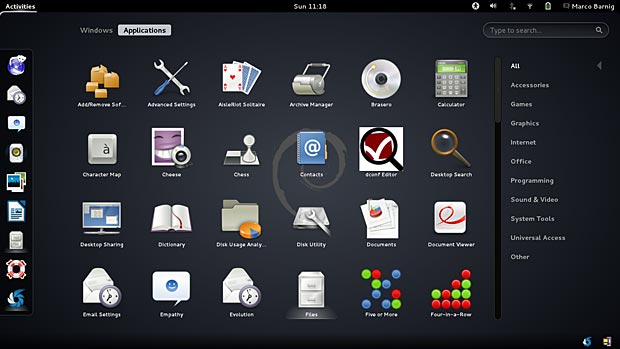
Debian Linux Desktop
Je viens de faire début novembre 2014 la mise à jour de Wheezy sur la version 7.7 édité le 18 octobre 2014. Une mise à jour de maintenance a été effectuée le 4 avril 2015.

Signalisation de la disponibilité d’un update
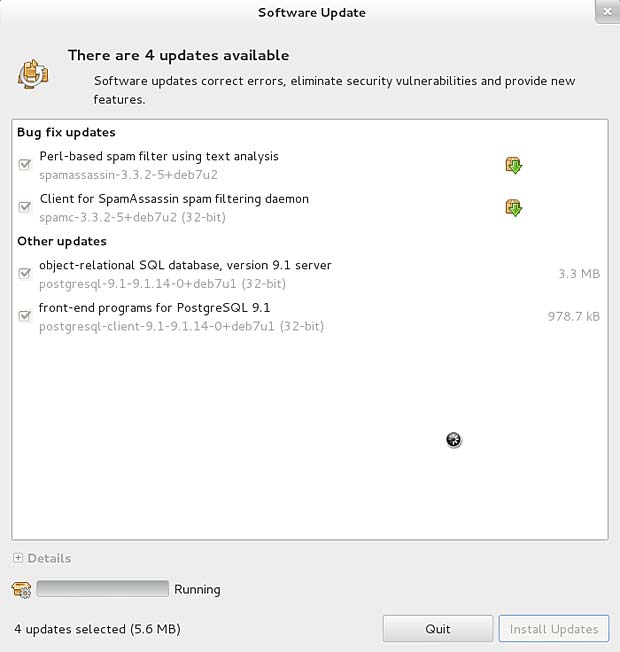
Software Update
Display Manager
Debian Linux supporte trois gestionnaires d’affichage principaux :
- gdm3 : Gnome Display Manager
- kdm : KDE Display Manager
- xdm : X Display Manager
Lors du login, je peux choisir les gestionnaires suivants :
- GNOME (= default)
- GNOME Classic
- KDE Plasma Workspace
Je préfère le gestionnaire GNOME pour l’affichage.
Permissions et Sécurité
Dans Linux tout fichier se voit attribuer des droits pour 3 identités :
- le propriétaire – l’utilisateur qui a créé le fichier ou l’utilisateur que root a désigné comme propriétaire
- le groupe (qui n’est pas forcément le groupe du propriétaire)
- les autres (ceux qui ne font pas partie du groupe)
Pour chaque identité il existe 3 droits d’accès :
- r – read (le droit de lecture)
- w – write (le droit d’écriture)
- x – execute (le droit d’exécution)
La commande ls -l nous permet d’afficher les droits d’un fichier. La commande chmod (CHangeMODe) permet de définir et de changer les droits d’accès d’un fichier ou d’un ensemble de fichiers. L’option -R permet de traiter les répertoires de façon récursive.
Lors de l’installation de Linux, on met en place au moins deux comptes :
- Le compte root dont le nom est «root» et à qui on attribue un mot de passe. C’est le Superutilisateur ou l’administrateur du système.
- Un compte utilisateur auquel on peut attribuer n’importe quel nom («mbarnig» par exemple).
La commande whoami affiche le nom du compte. En mode utilisateur, le terminal affiche l’invité de commande
mbarnig@debian:~$A condition de connaître le mot de passe de «root», un utilisateur peut devenir super-utilisateur et tout faire sur le système, en entrant la commande su, validée par “Enter”. Le mot de passe est demandé, et après la saisie correcte, le terminal affiche l’invité de commande
root@debian:/home/mbarnig#La commande sudo (Substitute User Do) est similaire, mais les droits sont plus limités. On n’a pas besoin d’entrer le mot de passe «root». En outre, la validité du rôle «root» est limité dans le temps, il y a une expiration automatique après 15 minutes.
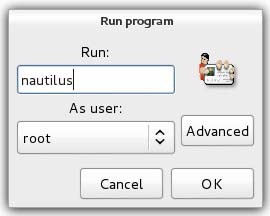
commande gksu
Pour utiliser des applications graphiques en mode «root», on a recours aux commandes gksu et gksudo. Une autre manière de devenir superutilisateur est d’ouvrir le terminal «root». Pour quitter le mode «root», on entre la commande exit. Pour suspendre le système, on utilise le menu Suspend. Pour arrêter le système, on presse simultanément Ctrl-Alt-Del, afin d’afficher la fenêtre Power-Off.
Structure des fichiers
Linux voit ses disques comme une unique arborescence. Une partition contient la racine du système de fichier, qu’on note /. D’autres partitions (CD-ROM, memory stick, …) peuvent être montées dans des répertoires. La structure standard des répertoires est décrite par le FHS (Filesystem Hierarchy Standard).
Les répertoires racine sur mon système Debian sont :
- bin – contient les commandes de base nécessaires au démarrage et à l’utilisation d’un système minimaliste
- boot – contient les informations nécessaires au démarrage de la machine
- dev – contient les fichiers spéciaux correspondant aux périphériques
- etc – contient la plupart des fichiers de configuration
- home – contient les répertoires personnels des utilisateurs. L’utilisateur mbarnig a pour répertoire /home/mbarnig (alias Home)
- lib – contient les principales bibliothèques partagées
- lost+found – contient les fragments de fichiers perdus après la réparation d’un disque endommagé
- media – point de montage pour les médias amovibles
- mnt – point de montage pour les systèmes de fichiers temporaires
- opt – contient les logiciels commerciaux
- proc – contient des fichiers avec des infos sur l’état du système et des processus en cours d’exécution
- root – contient le répertoire de l’administrateur système
- run – répertoire non standard pour centraliser les fichiers résidant en mémoire
- sbin – contient les commandes de base nécessaires à l’administration système
- selinux – Linux security module (LSM) qui permet de définir une politique de contrôle d’accès
- srv – contient des données pour les services hébergés sur le système
- sys – contient des données relatives au nouveau système de fichiers virtuels
- tmp – contient les fichiers temporaires
- usr – (UNIX System Resources) : contient des répertoires semblables à ceux présents à la racine mais qui ne sont pas nécessaires au fonctionnement minimal du système
- var – contient des données fréquemment réécrites
Pour naviguer à la racine on utilise la commande
cd /Pour chercher un fichier, on utilise les commandes
root path    : find / -name "filename"
current path : find . -name "filename"
On peut utiliser le joker (l’étoile *) avec des noms de fichier incomplets.
L’occupation du disque est indiquée avec le Disk Usage Analyzer.
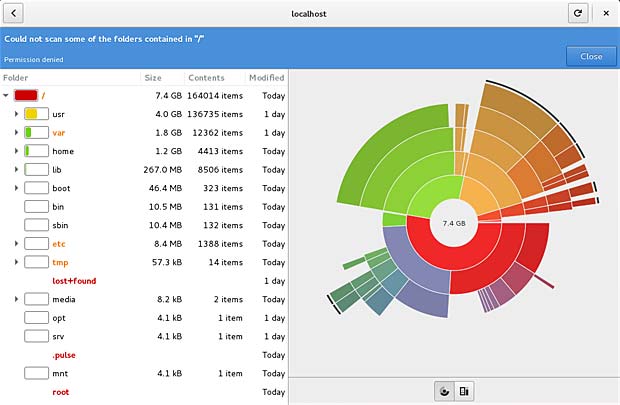
Linux Disk Usage Analyzer
Path
Les commandes qu’on écrit au clavier dans le shell sont cherchées dans l’ordre des répertoires contenus dans la variable PATH. Son contenu est une chaîne qui contient les chemins des répertoires séparés par deux-points (:). Pour afficher le contenu de la variable PATH, on utilise la commande
echo $PATHSur mon système le contenu se présente comme suit, avec les options de formatage
mbarnig@debian:~$ echo $PATH | tr : \\n
/usr/local/sbin
/usr/local/bin
/usr/sbin
/usr/bin
/sbin
/bin
Il a plusieurs scripts d’initialisation qui définissent les variables d’environnement, comme le PATH. Les plus usuels sont :
- /etc/bash.bashrc : script valable pour tous les utilisateurs, exécuté par une shell interactive lancée dans une session existante
- /etc/profile : script valable pour tous les utilisateurs, exécuté par une shell login qui demande UserID/Password, par exemple pour accéder au Desktop Debian lors du démarrage du système
- ~/.bashrc : script valable pour l’utilisateur identifié, exécuté par une shell interactive
- ~/.profile :script valable pour l’utilisateur identifié, exécuté par une shell login
Le caractère tilde ( ~ ) est utilisé pour spécifier le répertoire home d’un usager, comme par exemple /home/mbarnig. L’interprète de commande effectue la substitution
~/hello.txt  >> /home/mbarnig/hello.txt
~/hi.txt >> /home/hi.txt
Les scripts /etc/bash.bashrc, ~/.bashrc, etc/profile et ~/.profile sont des fichiers cachés qui ne sont visibles qu’avec l’option “show hidden files” dans le menu de l’explorateur de fichiers. La modification d’un fichier dans le répertoire /etc/ n’est possible qu’en “root”, par exemple avec la commande
gksu nautilus /etc/profileUne shell login recherche les scripts ~/.bash_profile, ~/.bash_login et ~/.profile dans cet ordre. Par défaut, les deux premiers fichiers (~/.bash_profile et ~/.bash_login) ne sont pas présents sur Debian.
Une shell non-interactive est activée par un programme et n’exécute aucun des scripts énumérés ci-avant. Les usagers qui souhaitent utiliser la même configuration pour les shells logon et non-login peuvent charger (source) le script ~/.bashrc dans le script ~/.profile, respectivement le script /etc/bash.bashrc dans le script /etc/profile.
J’ai opté pour inclure tous les variables d’environnement (PATH, …) dans le script ~/bashrc. Ce script est lu le premier si on ouvre le terminal standard en tant que usager, c.à.d. si on n’est pas “root”.
Environnement de développement
J’ai installé les paquets ruby, rake, java, gcc et g++ avec les commandes suivantes dans le terminal de commande root :
root@debian:/home/mbarnig# apt-get install ruby1.9.1
root@debian:/home/mbarnig# apt-get install rake
root@debian:/home/mbarnig# apt-get install default-jdk
root@debian:/home/mbarnig# apt-get install gcc
root@debian:/home/mbarnig# apt-get install g++
root@debian:/home/mbarnig# apt-get install subversion
root@debian:/home/mbarnig# apt-get install scons
root@debian:/home/mbarnig# apt-get install libfltk1.3
En outre les paquets suivants ont été installés de la même manière : autoconf, automake, xorg-dev, freeglut3-dev. Pour tester l’environnement de développement, des programmes Hello World ont été compilés dans différentes langues de programmation.
Java
Le code suivant a été écrit avec l’éditeur gedit et enregistré comme fichier HelloWorld.java dans le répertoire Home/Java.
public class HelloWorld {
public static void main(String[] args) {
System.out.println("Hello, World");
}
}
Avec la commande
mbarnig@debian:~$ javac HelloWorld.javadans l’application Terminal, le programme a été compilé en HelloWorld.class. Le programme est exécuté ensuite avec
mbarnig@debian:~$ java HelloWorldLa compilation de la librairie Java avec le fichier Rakefile a été également exécutée correctement, en invoquant la commande rake dans le répertoire en question.
C++
Le code suivant a été écrit avec l’éditeur gedit et enregistré comme fichier helloworld.cpp dans le répertoire Home/C++.
#include <iostream>
using namespace std;
int main()
{
cout << "hello world\n";
return 0;
}
Avec la commande
mbarnig@debian:~$ g++ helloworld.cpp -o helloworlddans l’application Terminal, le programme a été compilé en exécutable helloworld. Le programme est exécuté ensuite avec
mbarnig@debian:~$ ./helloworldGestion des paquets
Un paquet est un logiciel ou une partie d’un logiciel, qui a été préparé dans un format spécial, afin de faciliter sa recherche, la consultation d’informations à son sujet, ainsi que son installation et sa désinstallation. Ce paquet prend la forme d’un fichier avec un nom particulier : nom-du-logiciel_numéro-de-version_nom-de-l’architecture.deb. Un fichier paquet contient les binaires du programme ainsi qu’un certain nombre d’en-têtes. Le système de gestion des paquets de Debian est très performant et très facile à utiliser. Grâce à lui, les logiciels s’installent, se retirent et peuvent être mis à jour très facilement.
La commande de base pour manipuler des paquets Debian est dpkg. Elle ne peut toutefois pas télécharger des fichiers ou gérer des dépendances. Pour installer un paquet .deb disponible on utilise la commande
dpkg --install nom_paquet.debLors de l’installation les différentes étapes et les erreurs éventuelles sont affichées. L’installation peur s’effectuer en deux temps comme suit
dpkg --unpack nom_paquet.deb
dpkg --configure nom_paquet.deb
On peut obtenir des informations sur les paquets avec les options suivantes :
- dpkg –listfiles nom_paquet (sans .deb) : liste des fichiers installés par un paquet
- dpgk –search file : paquet d’où provient ce fichier
- dpkg –status nom_paquet.deb : entêtes d’un paquet installé
- dpkg –list : liste des paquets connus du système
- dpkg –contents nom_paquet.deb : liste des fichiers contenus dans un paquet non-installé
- dpkg –info nom_paquet.deb : entêtes d’un paquet non-installé
- dpkg –remove nom_paquet.deb : suppression d’un paquet installé, sans les dépendances et fichiers de configuration
- dpkg –purge nom_paquet.deb : suppression d’un paquet installé, avec les dépendances et fichiers de configuration
La commande dpkg tient un journal verbeux de toutes ses actions dans /var/log/dpkg.log.
À un niveau plus élevé, on trouve les commandes apt et apt-get (advanced package tool) tout comme un outil plus récent aptitude qui peut être utilisé en mode console où en mode graphique. aptitude est la commande recommandée pour gérer les paquets. On peut toutefois mélanger les commandes aptitude det apt-get. Une autre interface graphique est Synaptic.
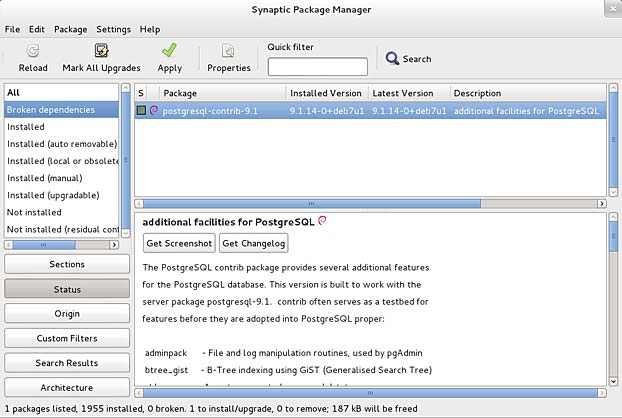
Synaptic Package Manager
Une ancienne interface qui n’est plus recommandée est DSelect.
apt a besoin qu’on lui fournisse une liste de sources de paquets : c’est le fichier /etc/apt/sources.list qui décrira les différents emplacements (ou sources) publiant des paquets Debian. La liste des sites web miroirs qui distribuent les paquets Debian est disponible sur le site web de l’organisation Debian. Les archives Debian au Luxembourg sont hébergées sur les sites web debian.mirror.root.lu/ (root S.A.) et debian.mirror.lhisp.com/ (lhisp Luxembourg Hosting)
Un générateur en-ligne d’une liste source Debian est disponible sur le site web debgen.simplylinux.ch. Mon fichier /etc/apt/sources.list se présente comme suit :
deb http://ftp.de.debian.org/debian stable main
contrib non-free
deb http://ftp.debian.org/debian/ wheezy-updates main
contrib non-free
deb http://security.debian.org/ wheezy/updates main
contrib non-free
Création d’un paquet .deb
Un paquet Debian n’est pas seulement une archive de fichiers destinés à l’installation, mais il contient également des méta-informations pour gérer les dépendances, les conflits, les suggestions, l’installation et la suppression des fichiers. Le fichier-méta le plus important est control. Un exemple simple pour intégrer le programme helloworld dans un paquet .deb est présenté ci-après :
Package: helloworld
Version: 1.0
Installed-Size: 1024
Maintainer: Marco Barnig - mbarnig@pt.lu
Architecture: i386
Section: custom
Priority: optional
Essential: no
Filename: helloworld.deb
Depends: bash
Description: affiche le texte "hello world" sur l'écran
Les paquets plus complexes utilisent en outre les paramètres suivants :
Recommends: dépendances facultatives (liste des paquets
dont l'installation est recommandée pour que le système
fonctionne correctement)
Suggests: autres dépendances facultatives
Conflicts: liste des paquets qui peuvent entrer en conflit
avec le paquet
à installer
Tag: clés de recherche
Size: taille du paquet
MD5sum: empreinte digitale du paquet (sécurité)
En plus du fichier control, le paquet Debian peut contenir un certain nombre de fichiers et de scripts appelés par dpkg à différentes étapes du traitement du paquet. Il s’agit des fichiers suivants :
preinst - ce script est exécuté préalablement l'installation
du paquet
postinst - ce script est exécuté après l'installation
du paquet
md5sums - liste des empreintes numériques de tous les
fichiers du paquet
conffiles - liste des fichiers de configuration
Pour assembler le paquet, un répertoire mon_paquet est créé avec le contenu suivant :
/DEBIAN/control
/usr/bin/helloworld
Ensuite on peut générer le paquet avec la commande dpkg-deb :
dpkg-deb --build mon_paquetOn peut répertorier le nouveau paquet dans le répertoire Home avec la commande
find -name mon_paquet.debet l’installer avec la commande
dpkg -i mon_paquet.debMise à jour
Le système de paquets utilise sa propre base de données pour garder une trace des paquets qui sont installés, de ceux qui ne sont pas installés et de ceux qui peuvent être installés. Le programme apt-get utilise cette base de données pour retrouver comment installer les paquets demandés par l’utilisateur ainsi que pour retrouver les paquets supplémentaires nécessaires afin qu’un paquet sélectionné fonctionne correctement. Pour mettre à jour cette liste, on utilise la commande
apt-get updateCette commande vérifie la liste des paquets trouvés dans les archives dans /etc/apt/sources.list. La mise à niveau de paquets est effectuée avec la commande
apt-get upgradeL’option -u oblige apt à afficher la liste complète des paquets qui seront mis à niveau.
Pour faire la mise à jour vers une nouvelle distribution, on utilise la commande
apt-get dist-upgrade(distribution-upgrade). Cette commande est aussi utilisée pour faire la mise à niveau dans les dépendances des paquets installés. Les commandes
apt-get clean
apt-get autoclean
sont utilisées pour supprimer des paquets non-utilisés. Pour afficher la version installé d’une distribution Debian, on utilise la commande
cat /etc/debian_versionou
lsb_release -aDe Wheezy à Jessie
La version 8.0 de Debian, connue sous le nom de Jessie, a été initialement publiée le 26 avril 2015. La version 8.6 a été publiée le 17 septembre 2016. Comme mon système actuel avait un problème de démarrage, j’ai du réinstaller fin 2016 la version originale de Debian 7 (Wheezy) à partir de mes DVD’s. Pour activer le WiFi, j’ai copié le fichier iwlwifi-3945-ucode à l’emplacement /lib/firmware. Ensuite j’ai procédé à un update / upgrade de Wheezy, suivi d’un changement de version en remplaçant “Wheezy” par “Jessie” dans la liste “/etc/apt/sources.list“.
Pour aller dans le mode terminal, entrez ctrl+alt+f1. Pour retourner dans le mode graphique, entrez ctrl+alt+f7.
Liens
La liste suivante fournit des liens vers des sites web avec des informations utiles au sujet de Linux :
- Linux Commands Cheat Sheet, par PCWDLD
- Référence Debian (version 2), debian.org
- The Debian 7 Administrator’s Handbook, by Raphaël Hertzog and Roland Mas
- Formation Debian GNU/Linux, par Alexis de Lattre, Rémy Garrigue, Tanguy Ortolo, Adrien Grand
- The Linux command line, by William Shotts
- Sécurité – Droits d’accès – GNU/Linux, comment ca marche
- Root et Sudo: GNU/Linux fort en sécurité, Libre Fan
- Cours Linux : sudo, Génération Linux
- Rechercher des fichiers, Openclassrooms
- Easy way to create a Debian package and local package repository, linuxconfig.org

