Speak to the web robots

Last update : July 2, 2013
Web Robots (also called crawlers, wanderers or spiders) are programs that traverse many pages in the World Wide Web by recursively retrieving linked pages. For various reasons web robots are not always welcome to access certain web pages.

web robots

Googlebot

A simple method used to exclude web robots from a server is to create a file on the server which specifies an access policy for robots. This file must be accessible via HTTP on the local URL “/robots.txt”. The contents of this file uses two records: user-agent and disallow.

It is not an official standard backed by a standards body, or owned by any commercial organisation. It is not enforced by anybody, and there no guarantee that all current and future web robots will use it. Consider it a common facility the majority of web robot authors offer the WWW community to protect web servers against unwanted accesses by their robots.

The latest version of the robots.txt document can be found on http://www.robotstxt.org/orig.html.

Another way to tell web robots what to do is the use of meta tags index and follow. Informations about these meta tags are available at the metatags.info website.

Examples :
index the whole website
<meta name="robots" content="index, follow" />
index the current page and stop there
<meta name="robots" content="index, nofollow" />
ignore the current page, but crawl the other web pages
<meta name="robots" content="noindex, follow" />
ignore the whole website
<meta name="robots" content="noindex, nofollow" />

There are more robot meta tags. Sometimes search engines uses descriptions from the ODP (Open Directory Project) as the title and snippet for a web result. The tag noodp lets you opt out of the ODP title and description. The tag noydir does the same for the Yahoo directory. The tag noarchive prevents serach engines from showing the cached link for a page. The tag nosnippet prevents a snippet from being shown in the search results. The tag noimageindex lets you specify that you do not want your page to appear as the referring page for an image that appears in Google search results.

ZenCart configuration tips

Default Tax Class :
To set a default Tax Class for new-products, find out the tax class ID number in Admin> Locations/Taxes> Tax Classes and enter this ID in the field Product Price Tax Class Default – When adding new products? in the Admin> Catalog> Product Types menu.

Weights and Prices attributes:
Attribute Prices can be entered with a prefix of + or – or blank

  • + and blank will add the attribute price
  • – will subtract the attribute price
  • When you Price by Attribute, the price you enter here will be added to your base price, whether you define a + prefix or not.

Weight can be entered optionally if it effects the product weight with a prefix of + or – or blank

  • + and blank will add the attribute weight
  • – will subtract the attribute weight

The prefixes are set in the attributes_controller webpage :

ZenCart Attributes

ZenCart Attributes

Attribute flags:
The default values for the attribute flags on the attributes_controller webpage (see image above) are set with the following options on the product type info layout webpage :

  • ARTWORK Attribute is Display Only
  • ARTWORK Attribute is Free
  • ARTWORK Attribute is Default
  • ARTWORK Attribute is Discounted
  • ARTWORK Attribute is Included in Base Price
  • ARTWORK Attribute is Required

WordPress themes and templates

last update : April 3, 2012
A WordPress Theme is a collection of files that work together to produce a graphical interface with an underlying unifying design for a weblog. These files are called template files. Some templates (the header.php and footer.php template files for example) are used on all the web pages, while others are used only under specific conditions.

A simple WordPress web page structure is made up of three basic building blocks: a header, the content, and a footer. The main template file is index.php, it’s function is to call other template files and to gather information from the database (posts, pages, categories, etc.) with the WordPress Loop. Most WordPress pages contain one or more sidebars (sidebar.php) that contains navigation features and more information about the website.

The Theme’s style sheet determines the look and placement of the header, footer, sidebar, and content in the user’s browser screen.

WordPress features two core page views: the single post view is used when the web pages displays a single post. The multi-post view lists multiple posts or post summaries, and applies to category archives, date archives, author archives, and (usually) the “normal” view of the blog’s home page. WordPress uses a template hierarchy to select the right template file to display a certain type of page. Template files include the use of XHTML tags and CSS references. HTML elements and CSS references can cross template files, beginning in one and ending in another. Tracking down where an HTML element begins and ends can get complicated if a Theme is designed or modified.

A very simple, but fully functional loop page (index.php) is shown below:

<?php
get_header();
if (have_posts()) :
   while (have_posts()) :
      the_post();
      the_content();
   endwhile;
endif;
get_sidebar();
get_footer();
?>

Template tags are used within the blog to display information dynamically or to customize the blog. It provides the tools to make the blog individual and interesting. The template tags are segmented as follows :

  • include tags
  • blog info tags
  • lists & dropdown tags
  • login/logout tags
  • post tags
  • comment tags
  • date and time tags
  • category tags
  • author tags
  • tag tags
  • edit link tags
  • permalink tags (a URL at which a resource or article will be permanently stored)
  • links manager tags
  • trackback tags
  • general tags
  • geo tags

The the_content() template tag displays the content of the post. The post meta data is the “administrative” information provided to viewers about each post. An archive is a collection of historical posts. In the default usage, the posts displayed on the main index are recent chronological postings. By default, the archive will use index.php, and thus look the same as the front page. A special archive.php file can be used to visually disambiguate archives from the front page. The same is true for category views. It is even possible to create separate category template files for each category.

To cut down the size of a page,  excerpts (a condensed description of a blog post) rather than the entire content of a post or the <!–more–> tag can be used. With the static front page it’s possible to display something special only on the front page of the blog. The list of the typical WordPress pages are listed herafter :

  • home page
  • single post
  • page
  • category
  • tage
  • author
  • date
  • search result
  • 404 (not found)
  • attachment

To style a blog for print, it’s best to use a print.css sytle sheet file. To integrate code in a wordpress page, refer to the following guidelines. Here is a checklist to verify the proper setup of a new theme. Informations about WordPress widgets are available at the widgets website.

The WordPress default theme based on Kubrick contains two stylesheets. The file rtl.css is called when you are using a language localization that reads from right to left (e.g., Arabic or Hebrew). The file style.css is separated in segments:

  • Typography & Colors
  • Structure
  • Headers
  • Images
  • Lists
  • Form Elements
  • Comments
  • Sidebar
  • Calendar
  • Various Tags & Classes
  • Captions

The most recent default Worpdpress theme is Twenty Eleven, version 1.3.

HTML Character Entity References

Character Entities References are the way you put special letters, numbers and symbols on the web page. A character entity reference consists of an ampersand (&), followed by a pound sign (#), the number of the character entity, and finishing with a semi-colon (;). Alternately, for some characters you can put ampersand, the name of the character (but no # sign), followed by a semi-colon.

The following table shows some popular symbols :

34 quot quotation mark = APL quote
38 amp & ampersand
60 lt < less-than sign
62 gt > greater-than sign
160 nbsp no-break space = non-breaking space
169 copy © copyright sign
174 reg ® registered sign = registered trade mark sign
8226 bull bullet = black small circle
bullet is NOT the same as bullet operator

Character entities or extended characters for WordPress are explained on the codex.wordpress.org website.

Firebug

Firebug

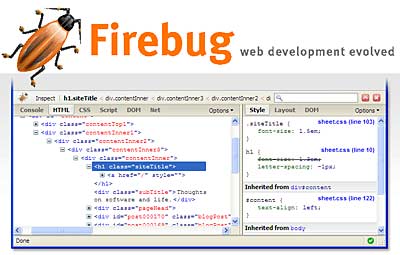
Firebug (version 1.3.3), developped by Joe Hewitt and Rob Campbell, is a free and open source (BSD) debug tool. It integrates with Firefox to put a wealth of tools at the fingertips of web designers. The tool allows to edit, debug, and monitor CSS, HTML, and JavaScript live in any web page.

Firebug makes it simple to find HTML elements buried deep in the page. Firebug’s CSS tabs tell you everything you need to know about the styles in your web pages, and if you don’t like what it’s telling you, you can make changes and see them take effect instantly. When your CSS boxes aren’t lining up correctly it can be difficult to understand why. Let Firebug be your eyes and it will measure and illustrate all the offsets, margins, borders, padding, and sizes for you. Your pages are taking a long time to load, but why? (JavaScript, image compression, partner’s servers). Firebug breaks it all down for you file-by-file. When things go wrong, Firebug lets you know immediately and gives you detailed and useful information about errors in JavaScript, CSS, and XML. The Document Object Model is a great big hierarchy of objects and functions just waiting to be tickled by JavaScript. Firebug helps you find DOM objects quickly and then edit them on the fly. The command line is one of the oldest tools in the programming toolbox. Firebug gives you a good ol’ fashioned command line for JavaScript complete with very modern amenities. Having a fancy JavaScript debugger is great, but sometimes the fastest way to find bugs is just to dump as much information to the console as you can. Firebug gives you a set of powerful logging functions that help you get answers fast.

Facebook FB.Connect.showFeedDialog

FB.Connect.showFeedDialog is a very powerful method which pops up a Feed form, without the need of a session, and an iframe pops up letting the user confirm publication of a story.

The required parameters are:

  • template_bundle_id  string
    The id of the feed template you want to use
  • template_data  object
    Data associated with the template (for short and full stories)
  • target_id array
    If you are publishing to other people’s Feeds, this array contains that friend’s user ID. The Feed story template must include the {*target*} token
  • body_general string
    Associated text for short and full stories
  • story_size FeedStorySize
    This parameter has been deprecated. Pass null in its place
  • require_connect RequireConnect
    Either FB.RequireConnect.doNotRequire, FB.RequireConnect.require, or FB.RequireConnect.promptConnect – The action to occur if the user has not authorized this application
  • callback Callback
    Callback to be executed after function is completed

The optional parameters are :

  • user_message_prompt string
    The label (which could be in the form of a question) that appears above the text box on the Feed form
  • user_message object
    A simple JavaScript object containing single property, value, which is set to the content that the user enters into the Feed form. When the Feed form is created, you can pass along this object to populate suggested text in the text box. The user can then edit this text. When the user publishes the Feed form, Facebook sets the value property to whatever text the user typed

Some tutorials about the FB.Connect.showFeedDialog method are shown hereafter :

Development of facebook applications

The Facebook guide Creating a Platform Application shows how to configure the settings and integration points for a Facebook Platform application and how to configure a host server. Demo applications are also available on the Facebook development website. The Anatomy of a Facebook Application is useful to get an idea how to integrate an application into the Facebook experience. If you plan on internationalizing your application, you should use English as the native language, as the Translations tool can translate from English only. Platform guidelinesterms of service (Statement of Rights and Responsibilities) and Facebook Platform Policy and Escalation Procedures are accessible on the same website. The following guide explains how applications are authorized, the Developers blog runs all major Facebook announcements.

The following url gives access to the personal facebook developer webpage :

The developer API key is linked to the domain name.

Integration of an application in Facebook can take many forms :

  • The Application Directory allows users to find an application
  • The About page tells users about an application
  • The Canvas page is the main page of the application (FBML or an iframe
  • The Facebook profile is the online representation of a user’s real world identity
  • The profile box is usually the place to show the most recently updated information or the most recent actions of the user
  • The Applications menu is where users go to access your applications
  • Bookmarks appear on every user’s home page as well as on the Applications menu
  • Application tabs let users feature full canvas-like pages for applications they enjoy the most
  • The Boxes tab contains application profile boxes
  • The Info tab on the profile allows users to express their interests in a more structured way than before
  • Applications can integrate into the Publisher so users can create or find rich content and post it directly into their own or their friends’ Walls
  • Feed forms are special FBML components that allow applications to publish Feed stories on the behalf of users. Your application can publish directly into the user’s and the user’s friends’ Mini-Feeds
  • Users can set their privacy options from your application’s privacy/settings page
  • Applications can access News Feed and post stories to it
  • Applications can send notifications to a user through email
  • Requests are also sent in the form of notifications and displayed on the right top corner of the homepage
  • Dashboards allow users to manage their own content in an application

Ten succesfully integrations of Facebook Connect into websites are presented by Aziz Haddad (in french).

Redirection of a webpage

To avoid “404 File Not Found” Error!’s after deleting webpages in the context of a website update, it’s often useful to redirect these webpages to a new url. There are at least 2 major different forms of web page redirection : Client-side Redirection & Server-side Redirection.

Stay away from Client-side Redirection. These methods of redirecting a webpage range from using html meta tags, to javascript, and even using flash embedded on a page to redirect. All of these methods are notorious for getting you de-indexed from search engines, or at the very least, you’re page getting automatically penalized from search engines.

The best and safest way to this is the “301 Redirect“. The following tutorials describe the “301 Redirect” method :

There are different ways to set up an “301 Redirect“. Using .htaccess to accomplish the 301 redirect is highly suggested due to it being fairly convenient to manage, rather than setting redirects on each individual page, you can simply add the redirect code to the .htaccess file. An Online .htaccess editor to configure the redirection is offered by Hideyo Ryoken & Masato Mannen.

A php sample code to redirect an individual page permanently to a new location is shown hereafter :

  1. <?
  2. header( “HTTP/1.1 301 Moved Permanently” );
  3. header( “Status: 301 Moved Permanently” );
  4. header( “Location: http://www.new-url.com/” );
  5. exit(0); // This is Optional but suggested, to avoid any accidental output
  6. ?>

If the redirection is only temporary, you should use the “302 redirect” method. A php sample code to redirect an individual page temporary to a new location is shown below :

  1. <?php
  2. header(”Location: http://www.NewTemporaryWebAddress.com”);
  3. exit();
  4. ?>

Google Maps API, Mapplets and KLM

Google offers an API to embed Google maps into personal websites. A Google Maps key is needed to access the API, to apply for the key you need to have a Google account and to agree to the terms and conditions of Google Maps API. The key can be generated online on the Google signup webpage.

Google maps are integrated in a website with Javascript. Embedding static maps without Javascript by using image tags is also possible.

The Google API accepts certain parameters. Some are required while others are optional. The parameter list is given below:

  • center of the map : This parameter takes a comma-separated {latitude, longitude} pair
  • zoom : Maps on Google Maps have an integer “zoom level” which defines the resolution of the current view. Zoom levels between 0 (the lowest zoom level, in which the entire world can be seen on one map) to 19 (the highest zoom level, down to individual buildings) are possible within the normal maps view.
  • size : width and height of the map in pixels; 640×640 is the largest image size allowed
  • format : gif, png or jpg for images
  • maptype : satellite, terrain, hybrid, and mobile (default = roadmap)
  • markers : one or more markers to attach to the image at specified locations. This parameter takes a string of marker definitions separated by the pipe character (|)
  • path : a single path of two or more connected points to overlay on the image at specified locations. This parameter takes a string of point definitions separated by the pipe character (|)
  • span : a minimum viewport for the map image expressed as a latitude and longitude pair
  • frame : specifies that the resulting image should be framed with a colored blue border
  • hl : the language to use for display of labels on map tiles
  • key : the Maps API key for the domain on which this URL request takes place
  • sensor : specifies whether the application requesting the static map is using a sensor to determine the user’s location

The process of turning an address into a geographic point is known as geocoding. Goggle provides a GClientGeocoder object to convert a string address into a latitudes and longitudes.

A marker descriptor contains a string defining the location to place the marker and the visual attributes to use when displaying the marker. These strings contain the following variable values:

  • {latitude} (required) specifies a latitudinal value with precision to 6 decimal places
  • {longitude} (required) specifies a longitudinal value with precision to 6 decimal places
  • {size} (optional) specifies the size of marker from the set {tiny, mid, small}
  • {color} (optional) specifies a color from the set {black, brown, green, purple, yellow, blue, gray, orange, red, white}
  • {alphanumeric-character} (optional) specifies a single lowercase alphanumeric character from the set {a-z, 0-9}. Note that default and mid sized markers are the only markers capable of displaying an alphanumeric-character parameter. tiny and small markers are not capable of displaying an alphanumeric-character

An online tool to create map-markers is available on the donkeymagic website.

The Google geo-developer website prodides documentation, tutorials, code samples, demos, guides and more ressources. A blog for Google geo-developers provides tips and tricks and announcements of new features concerning Google maps. Personal Geo Content can be submitted to Google, guidelines are available on the KLM webpage. KML is a file format used to display geographic data in an Earth browser such as Google Earth, Google Maps, and Google Maps for mobile.

Another useful option are Mapplets, mini-applications that run within Google Maps. You can create Mapplets that add new features or overlay your data on Google Maps.

Mike Williams published a great tutorial about the Google maps API.

eBay API

Today, I registered for an eBay Development account. The eBay Developers Homepage provides support, documentation, code samples, API keys, affiliate programs, forum, sandbox, tools, release notes and system announcements.

A sandbox key and a production key can be generated on the personal account page. There are different API’s available : shopping, merchandising, feedback, trading, client alerts, large merchant services, platform notification, research. The developer center is segmented in Windows, Java, php, Javascript, Flash and other. The eBay community codebase contains several open-source projects.

I started using the shopping API (view guide) which is optimized for response size, speed and usability. This API allows to search for eBay items, products and reviews, user info, and popular items and searches. You are able to retrieve public eBay data in a buyer-friendly view, for easy consumption by buyer-focused applications. The call reference (version 613) of the eBay shopping API is available on the following link. The call “FindItemsAdvanced” is the most useful and enables you to search for items on eBay based on many possible input fields and filters. Detailed informations are available here.